[Part of a series on getting by without passwords]
The final post in this series takes up the problem of securing email traffic without relying on the security of user-chosen passwords. There are two aspects to protecting email:
- Confidentiality: guaranteeing that only the intended recipients can read the contents of a message (Even when the message itself is transiting through untrusted networks, as email delivery is based on store-and-forward paradigm.)
- Authenticity: for the recipient to be certain that an incoming message indeed originated with the purported sender.
Public-key cryptography is well suited to serving both of these objectives. At a high-level authenticity is provided by the sender digitally signing the message with their private-key, while confidentiality is assured by encrypting the message using the public-key of each recipient. But the devil is in the details, and over the years many protocols/formats/standards have emerged around how exactly these operations are done, differing both in cosmetic ways- how the bits are laid out- and fundamental assumptions around key management. To keep the discussion tractable, we focus on two of the more popular formats in widespread use: S/MIME and PGP.
S/MIME and PGP
“The nice thing about standards is that you have so many to choose from.” — Andrew Tannenbaum
Not surprisingly there is more than one way to secure email, and each one has taken hold in different niche markets. PGP came first, S/MIME is the more enterprise-oriented format. Chronologically it arrived after PGP and was first codified by RFC 2633, building on formats. The differences between PGP and S/MIME can be grouped into two categories:
- Superficial/cosmetic: PGP defines its own home-brew format for messages and keys. S/MIME uses the cryptographic message syntax (CMS) format for messages and X509 for carrying keys, which is in turn built on ASN1.
- Philosophical/trust model: This is a more significant difference in approach to establishing trust in keys. Recall that sending an encrypted email to Alice requires having her public-key ahead of time. That boils down to the basic questions: where do you look up Alice’s public-key? When someone presents a key that purportedly belongs to Alice, how do you go about verifying that?
S/MIME assumes a public-key infrastructure or PKI mediated by trusted third-parties. Everyone receives digital certificates from these parties and can verify other credentials by reference to the same. PGP relies on a more grass-roots web of trust, with users exchanging keys in person or leveraging social networks by trusting existing contacts to vouch for each other.
Easy case: S/MIME
Because S/MIME is associated with enterprise/managed IT scenarios- think Windows shop running an Exchange server in-house and users accessing their email via Outlook clients- there is already plenty of precedent for using smart-cards to protect email. Outlook itself has supported S/MIME for 15+ years and Windows cryptography architecture abstracts away key-management from applications. As far as the application is concerned, same code paths are executed to sign/decrypt when the private key resides on local-disk or when that key lives on a smart-card that must be invoked to perform the operation itself. The operating system and underlying layers take care of the difference: for example cryptographic hardware can appear/disappear based on user actions of connecting/disconnecting it, some cards may require a PIN to authorize user actions etc.
Hard case: PGP
To this day PGP decidedly remains an “enthusiast technology” (to put it politely) voluntarily used by individuals instead of mandated by enterprise IT settings. Because use of cryptographic hardware by consumers is exceedingly rare, PGP keys are almost always managed in software and migrated to new devices via awkward import/export mechanisms. But there was an attempt dating back to 2004 at standardizing support for hardware tokens with the OpenPGP card specification.
It sounds promising: while S/MIME is silent on low-level key management interface or exact behavior of cryptographic hardware to manager user keys, OpenPGP Card attempts to prescribe in exacting detail exactly how such devices shall operate and what features they must support.
In reality, that turns out to be a bad idea.
How to limit future options: pick a card-edge
With OpenPGP Card, the system has committed to low-level details of a card. It is not just expressing baseline requirements (such as “must support RSA up to 2048-bit keys”) or describing a high-level interface for invoking functionality on the card. It prescribes low-level details about how the host and card communicate over the PC/SC interface as well as exact organization of data stored on card. Why is that too restrictive? For starters, let’s start with the concept of “card.” While smart-cards and most USB tokens indeed go through PC/SC (after all it stands for “Personal-Computer-to-Smart-Card”) there are other types of cryptographic hardware such as HSMs or even TPM which are not “cards” as far as the operating-system is concerned.**
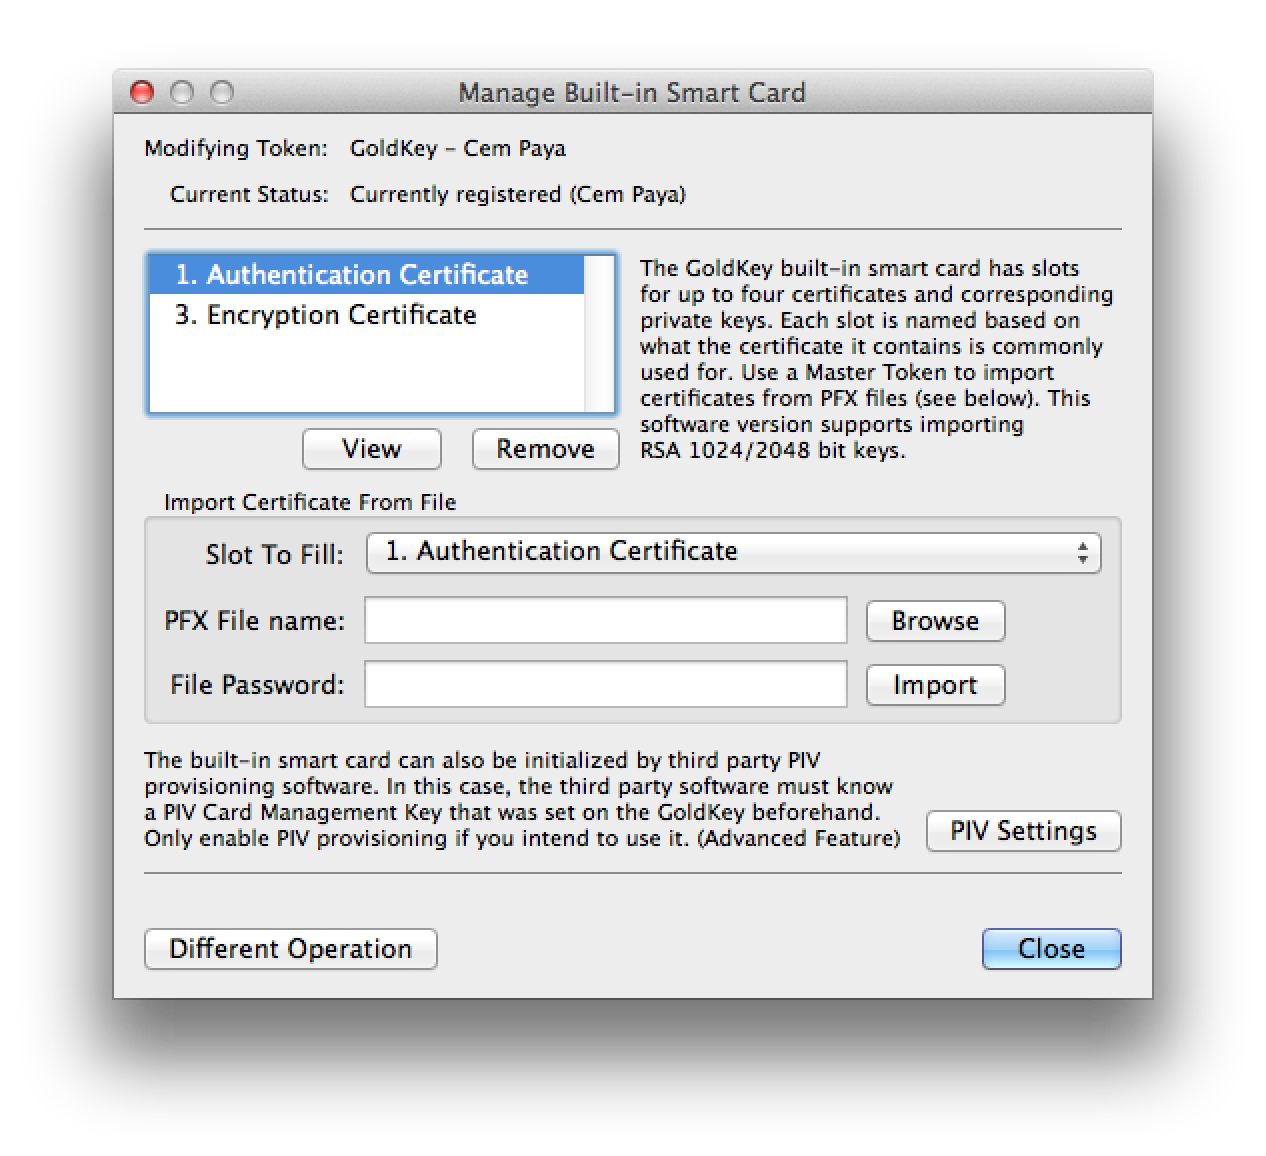
Even restricting our attention to cards, standardizing on the low-level interface to the card creates unnecessary incompatibility over superficial implementation details. By focusing on low-level wire protocol, GPG has limited itself to working with exactly one card application. Yet many standards have been introduced over the years for card-based applications: eID for electronic ID in the EU, CAC and later PIV for government employees in the US, GIDS for enterprise authentication, to name a handful. Many of them contain a superset of functionality required for PGP: generate key-pairs on board, perform private-key operations, store public-keys, use PIN for authorization etc. They exceed those requirements and improve on baseline by supporting multiple key-sets and elliptic-curve algorithms not originally envisioned by OpenPGP. With the exception of GIDS, they are also far more popular compared to PGP cards, produced in higher-volume with multiple suppliers benefiting from economies of scales. Yet none of these are usable for PGP directly, because of cosmetic differences in how their functionality is packaged into low-level commands.
Compare this to how SSH authentication integrates cryptographic hardware. There is no such thing as “OpenSSH Card.” Instead the implementation uses an existing abstraction layer for cryptographic hardware, namely PKCS #11. Any vendor that manufactures cryptographic hardware with the right features can write a PKCS11 module to package those features into a standard interface and compete in the market for hardware-based SSH authentication. In practice they don’t even need to write that module, because volunteers have already solved that problem: OpenSC ships a module with support for an impressive variety of cards. Another open-source packages SimpleTPM-PK11 allows using the TPM for managing keys. On the proprietary side, HSM vendors such as Safenet and Thales ship their own PKCS11 module written in-house to work with their specific model. As a result SSH authentication for both client and server side can take advantage of a variety of hardware offerings. To pick two examples: this blog covered using PIV tokens for SSH, others explored leveraging the TPM.
Restoring the abstraction layer
Luckily there is a solution that allows bringing that diversity of hardware to PGP: gnupg-pkcs11. This project is dated and by all appearances unmaintained— generally a red-flag increasing the chances of incompatibility caused by software rot. (Hosting source-code on Sourceforge is another red-flag considering the company was found to tamper with binaries. Luckily packages are available in upstream repos for major distributions such as Ubuntu.)
gnupg-pkcs11 replaces the GPG smart-card deemon with a new implementation that makes no assumptions about the “card” but instead calls into an existing PKCS #11 module for cryptographic functionality. Specifying this module as well as which keys on the card to pick (since a “token” in PKCS #11 model can have multiple keys) is done with configuration files. This part can be tricky, so here is a walk through of steps outlined in the man page.
Configuration
1. Replacing the smart-card daemon
First step is instructing GnuPG to use a different smart-card agent and specifying the application to use when prompting for a PIN. These lines appear in gpg-agent.conf, typically located in “.gnupg” folder under the user home directory.
scdaemon-program /usr/bin/gnupg-pkcs11-scd
pinentry-program /usr/bin/pinentry-qt4
2. Configuring the new daemon
Next step is configuring gnupg-pkcs11-scd itself. This is best done in two stages because the file contains friendly key identifiers which are not available at this point. Easiest way to discover them is by asking gpg-agent, which in turn invokes the smart-card daemon. A minimal configuration file gnupg-pkcs11-scd.conf pointing at the PKCS #11 module is sufficient to bootstrap that process:
# List of providers
providers p1

# Provider attributes
provider-p1-library /usr/lib/x86_64-linux-gnu/opensc-pkcs11.so
With that in place we can query the card for key identifiers:
$ echo "SCD LEARN" |\
gpg-agent --server gpg-connect-agent |\
grep KEY-FRIEDNLY
S KEY-FRIEDNLY EB1391B66C49F44859D1CF81BB97882E32154A2B /C=US/ST=CA/L=\
San Francisco/O=Widgets Inc./OU=Randomization/CN=Cem Paya/emailA\
ddress=notcem@nothere.net on PIV_II (PIV Card Holder pin)
(Note the misspelling “friednly” [sic] for friendly identifier.)
The output contains the distinguished name from each certificate discovered on the card, along with SHA1 hash of the public-key highlighted in red above. In this example there is just one certificate present, although a PIV card will typically contain up to four active certificates. Now SHA1 hashes can be used to indicate which keys are used to secure email by adding another section to gnupg-pkcs11-scd.conf:
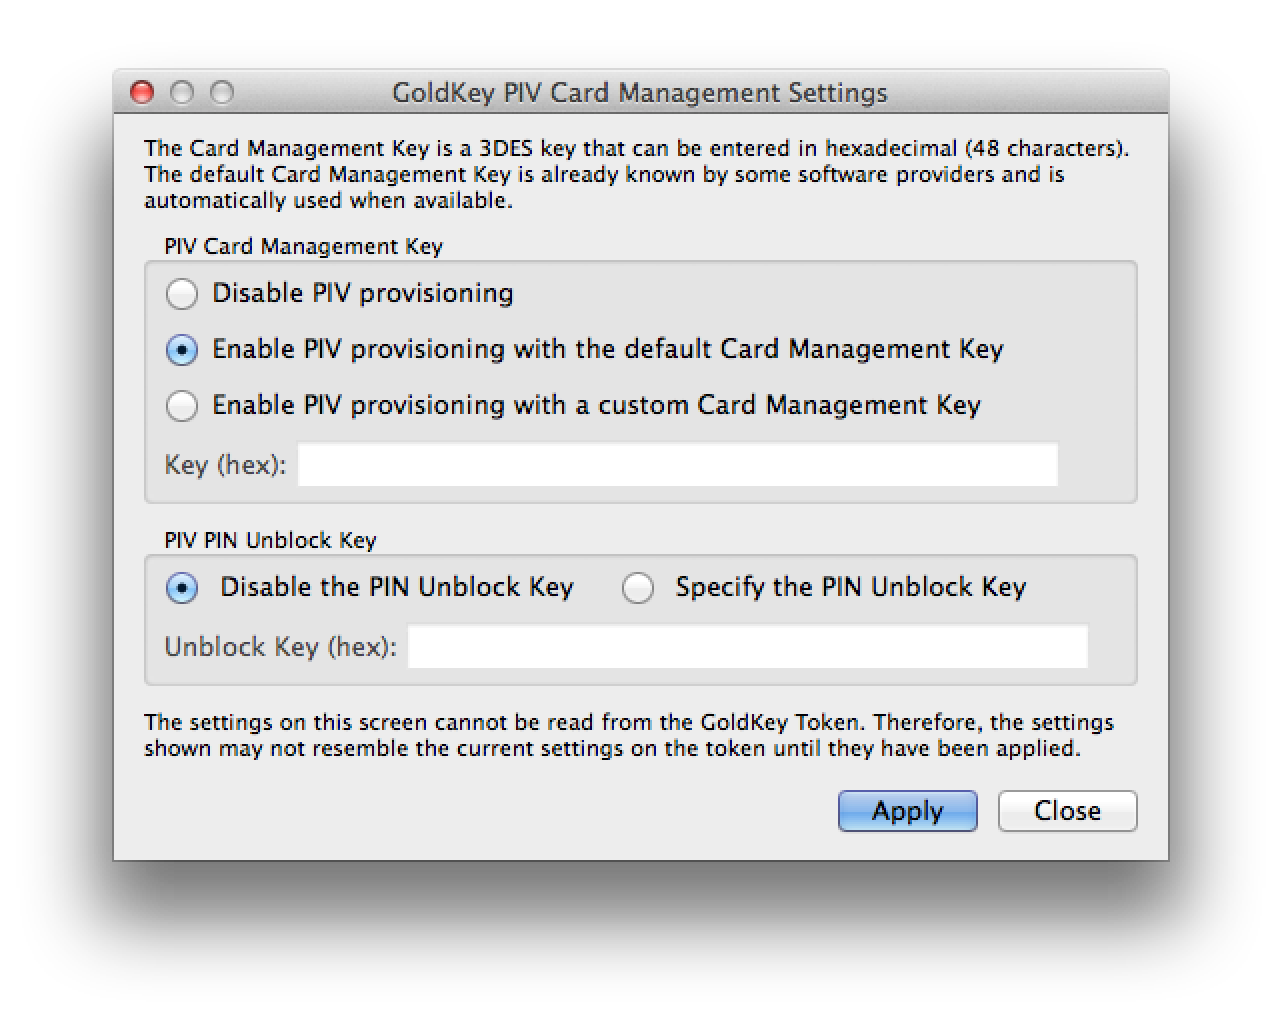
emulate-openpgp
openpgp-sign EB1391B66C49F44859D1CF81BB97882E32154A2B
openpgp-encr EB1391B66C49F44859D1CF81BB97882E32154A2B
openpgp-auth EB1391B66C49F44859D1CF81BB97882E32154A2B
This example is cutting corners by using the same key for signing and encryption which is suboptimal. A more realistic mapping would pick the PIV non-repudiation slot for signatures and PIV key-management slot for encryption.
3. Registering the keys with OpenGPG
The final step is making GPG aware of keys on the card. This involves going through the card-edit menu and invoking the “generate” option. The command name is misleading because new keys will not be generated on the card. (Similar to “ssh-keygen -D” retrieving existing keys from a hardware token, not generating new keys or otherwise altering state of the token.) Instead the replacement daemon returns existing public-keys on the card specified by SHA1 hashes above. GPG then combines those keys with additional information prompted from the user such as email address, expiration and proper name. In effect this step synthesizes “PGP keys” with their own meta-data out of existing key-pairs present on the hardware token.
Caveat: While the man page recommends disabling opengpg emulation after this step, in the experience of this blogger gnu-pkcs11 only works successfully in emulation mode.
User-experience
Putting it all together, here is sample of UX for private key operations.
Linux
Suppose we try signing a message from the command line:
echo "Hello world" | gpg2 -as
Assuming the token is connected, a system-modal dialog appears:

Qt4 PIN collection prompt
If we instead specified pinentry-gtk-2 in the configuration file, that UI would look like:

GTK-2 PIN collection prompt
After entering PIN, the signature operation is performed by the hardware token. Remaining steps are identical to the flow for software keys- the signature is formatted by gpg and output to console.
OSX
Surprisingly gnupg-pkcs11-scd also runs on OSX. GPGTools is a user-friendly implementation of PGP (as judged by the low standards of open-source software) and provides keyboard shortcuts and context-menu for decrypting text highlighted in any application. For example, decrypting in a web browser can be initiated by selecting MacPGP from the Services menu:
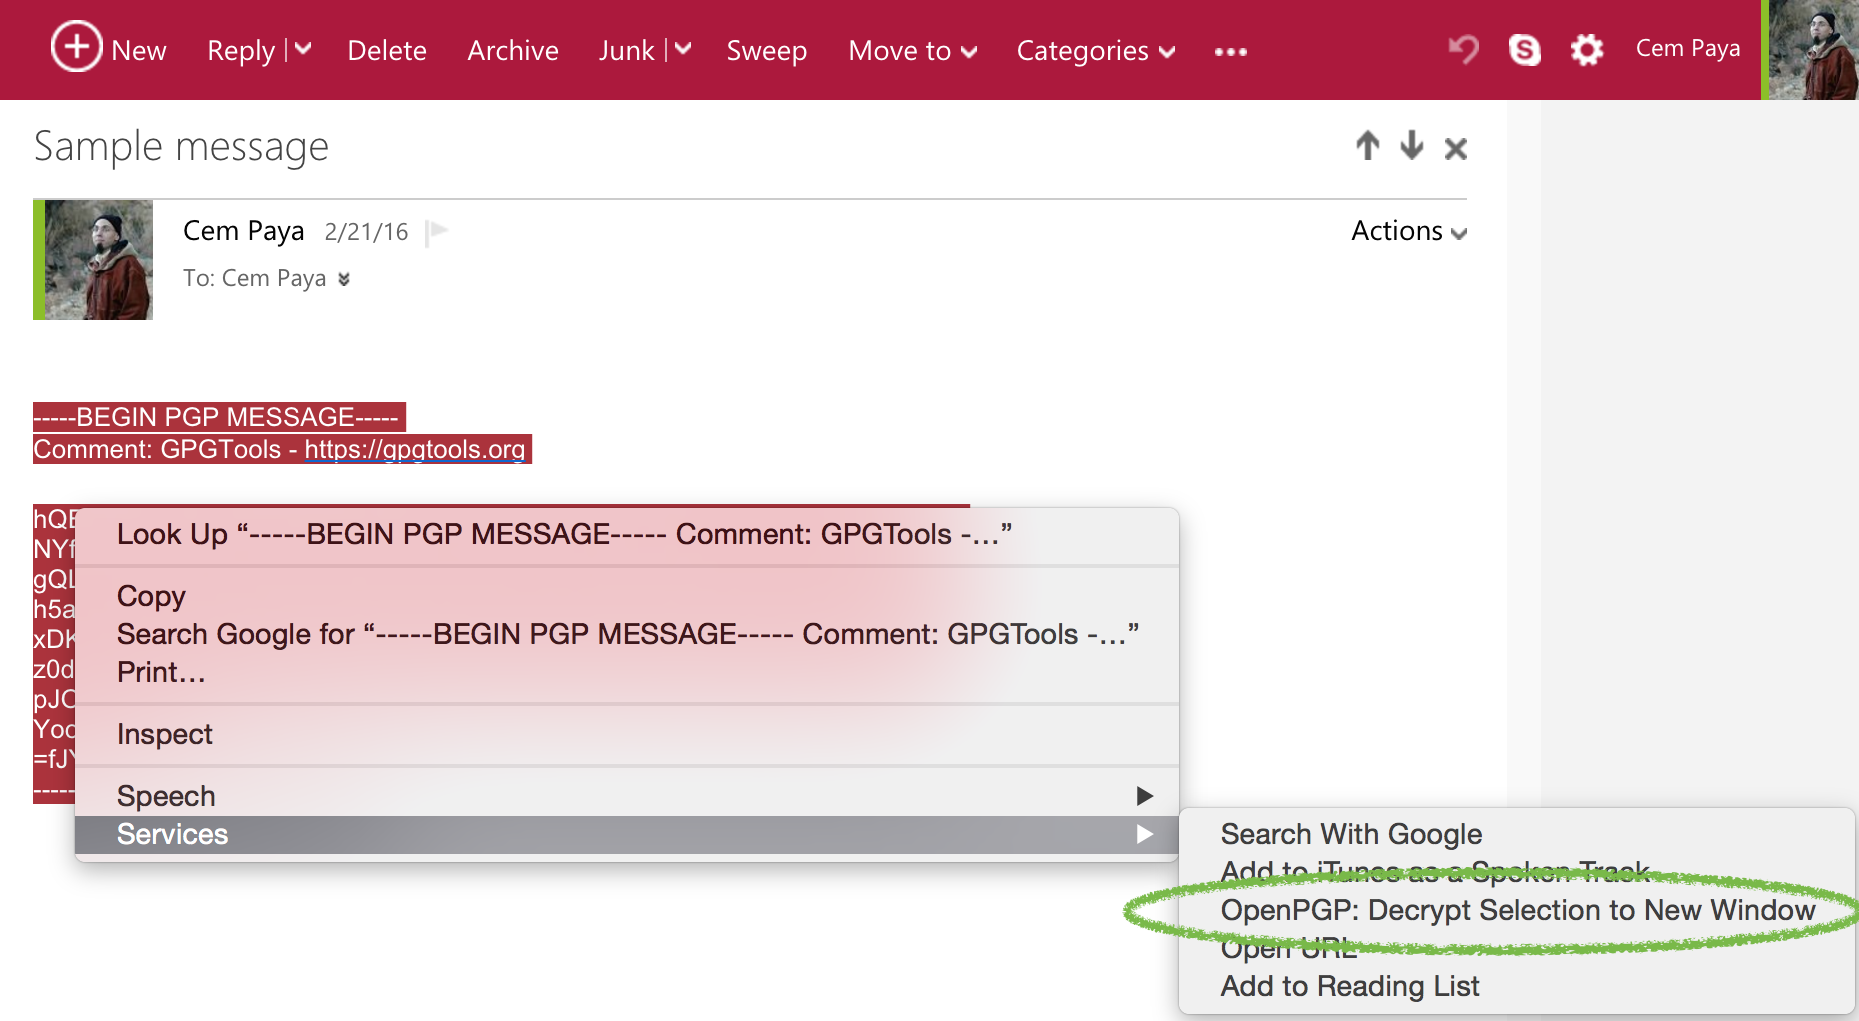
Decrypt highlighted text in web mail
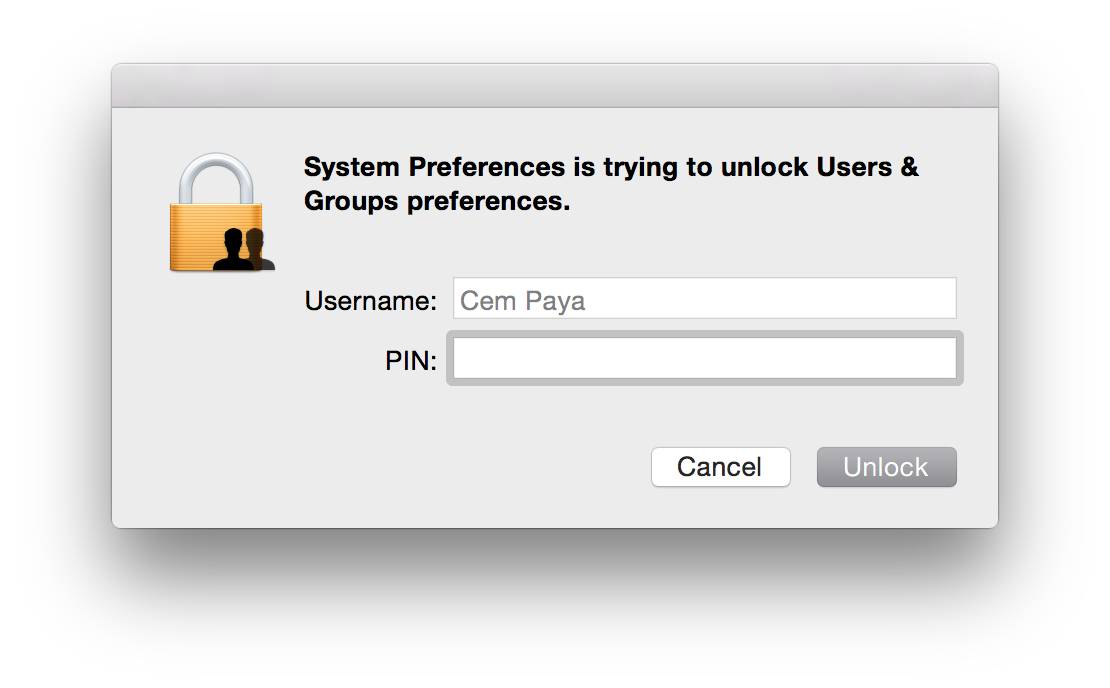
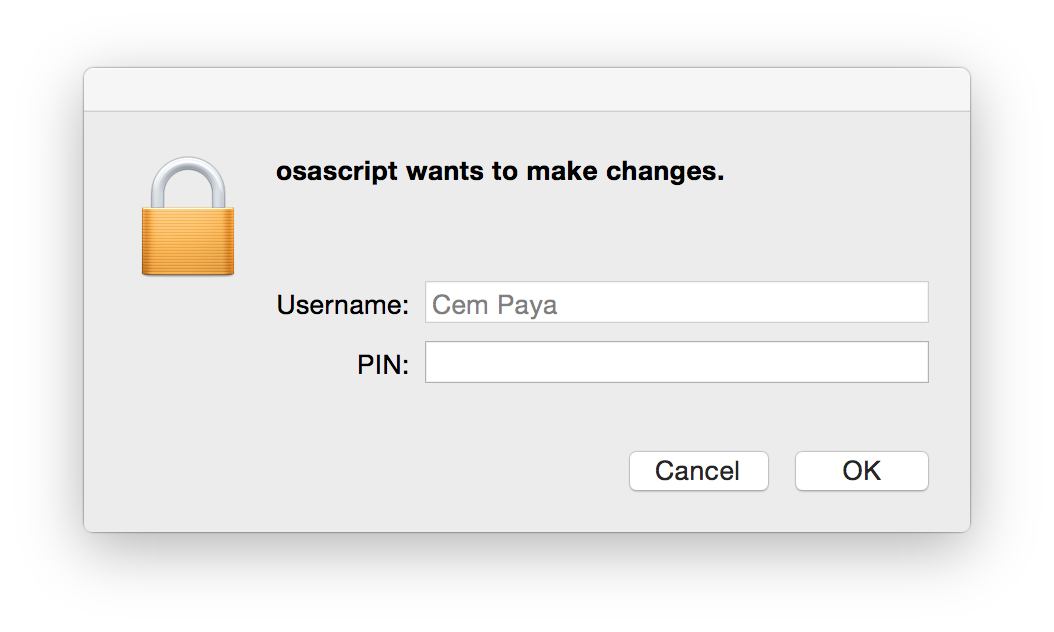
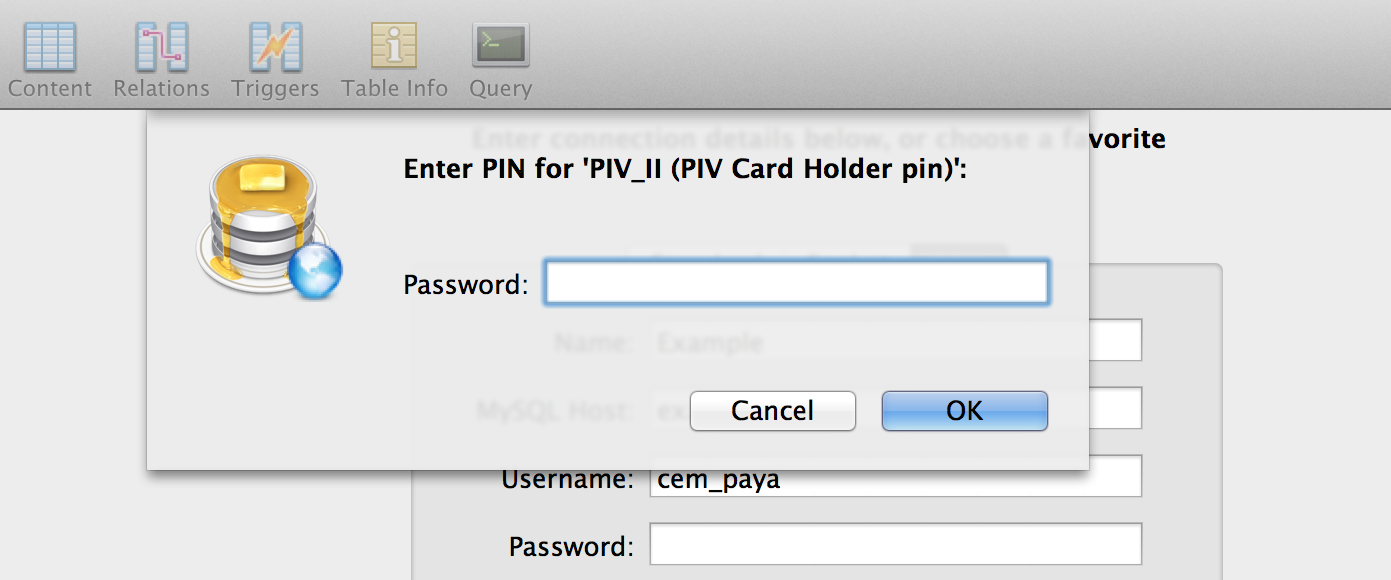
That brings up a PIN collection UI slightly more polished than the Linux versions:

OSX MacPGP PIN collection UI
Handling multiple devices
Existing keys on the card need to be registered with PGP only once. In order to use the hardware token with another device, it is easier to “export the private-key” to a file, copy the file over and import it into the key-ring on the new machine. Export in quotes because in the case of hardware keys, there is no secret information being exported. Despite GPG dutifully prompting for a passphrase to encrypt sensitive data, the only relevant information written to file is a reference to the card serial number and key identifier. Private-keys never leave the hardware token itself. The resulting export file is not sensitive in the way actual private-keys would be, making the migration process straightforward.
CP
** While a TPM can be made to look like a smart-card (for example, using Windows virtual smart-cards) that involves an emulation layer, not sending raw APDUs to the TPM as if it were a CCID device.


You must be logged in to post a comment.